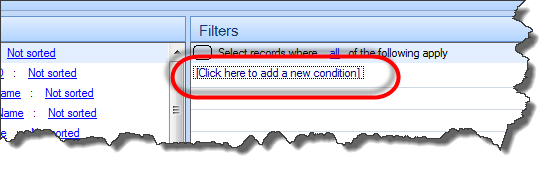
In order to actually apply a Filter this is done in the Filters area on the screen, click on the link titled: [Click here to add new condition], as illustrated below:
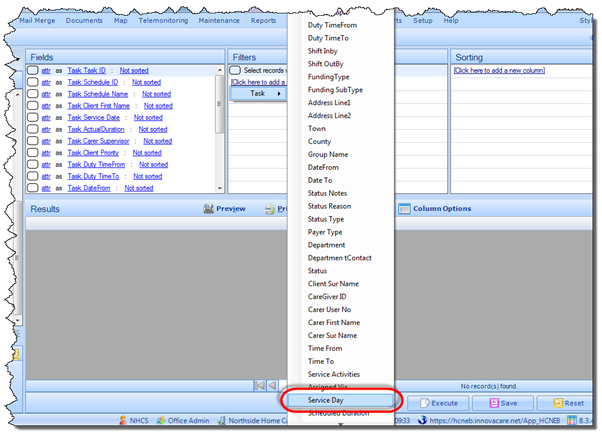
Once you have clicked on this link you will be presented with a list of all the Fields available to you from the Category you have already selected, in this example, the Category we selected was “Tasks”.
For each Field which we wish to apply the Filter, you must select this Field from the selection area. The screen shot below illustrates how the Field selection will be presented to you. Simply select the desired Fields you wish to apply the Filters to. Once you select a Field this will automatically populate in the Filter area of the screen:
So in the case of this example, the original reporting requirement was to illustrate and compare the Scheduled Duration of Tasks with the Actual Duration of Tasks, on a specific day, for a specific period. Therefore Filters should be applied:
§ For a defined period: 1st January of the current year to Date
§ For a particular Carer
§ Every Monday
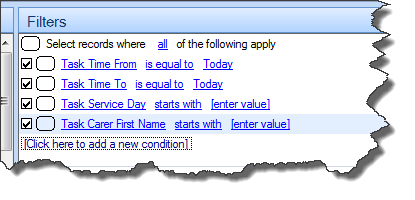
The screen shot above illustrates how the Filters section of the screen will appear once we have selected the Fields we wish to apply Filters to. Please note, we have not applied any Filters yet, we have simply selected the Fields that we wish to apply Filters to.
![]() In order to actually apply the Filter to each selected
field, you must select the “Operator” [which is essentially an
instruction on what data to show contained in the database relating to this
field] and give your instructions.
In order to actually apply the Filter to each selected
field, you must select the “Operator” [which is essentially an
instruction on what data to show contained in the database relating to this
field] and give your instructions.
For example, we wish to see this report for Tasks that took place from the start of the current year, therefore in the “Task Time From” we would select the “After” option, and then apply the date: 01/01/2016 along with the time: 00:00:00.
You can then continue to select the Operators for each Field and apply the Appropriate Filter to each Field.
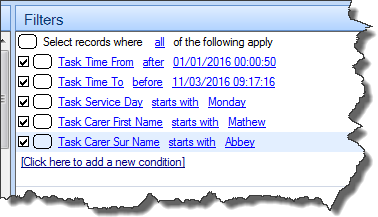
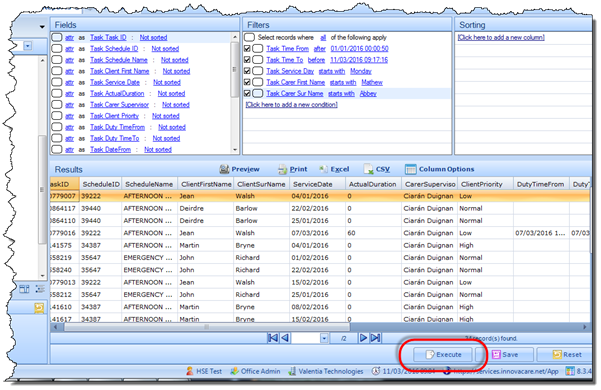
Please note, you can apply as many Filters as you wish to a report and the more Filters added, the more refined the resulting data will be. Once you have applied all required Filters, the Filter area of the screen will look something like the screen shot below.
|
|
So for example, here you see we have applied Filters to: § Date Periods § Day of the Week § Carers First Name § Carers Surname
Once Executed, the Report will now only illustrate data that are consistent with the Filters you have just added. |
To execute the Report, just click on the Execute button as highlighted below, all results will be displayed in the Results pane in the centre of the screen.
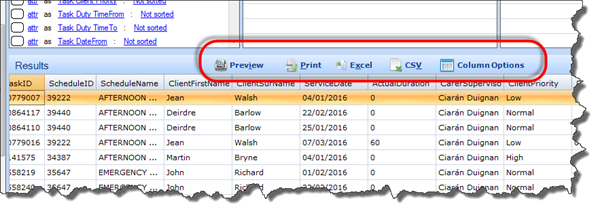
The results of the report can then be exported to excel or CSV format to your local machine, or alternatively you can print this directly from your machine.
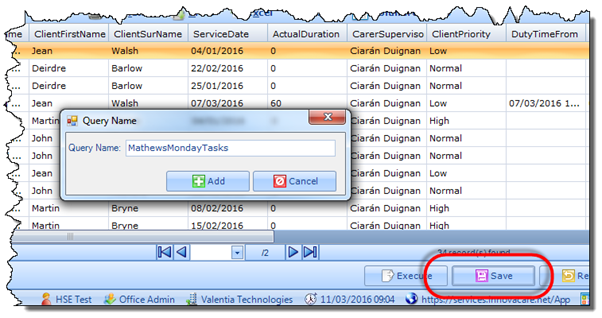
Reports can also be saved onto the Application and once saved will always be available to you. This will go directly to the “My Reports” tab on the Application. For full details on this refer to: My Reports.
The Ad Hoc Reporting Module can be used to creating simple and complex reports required that have not already been configured on the Application and there are a number of that these