

![]() To create a new Billing Chart, click the Add button
in the top right corner of the Billing Chart screen; this will open the Billing
Chart dialogue box.
To create a new Billing Chart, click the Add button
in the top right corner of the Billing Chart screen; this will open the Billing
Chart dialogue box.
There are several different elements that you will need to define in order to complete the chart.
Billing Chart Status & Dates
The first thing you will need to define is if the Billing Chart is Active or not. There is a checkbox at the top of the dialogue box that says Active; by default this will be ticked. Once entered onto the system, a Billing Chart cannot be deleted; however, if it is no longer being used, it can be made Inactive, meaning that no one will be able to use it to calculate Billing Rates. To make a chart Inactive, simply uncheck this box.
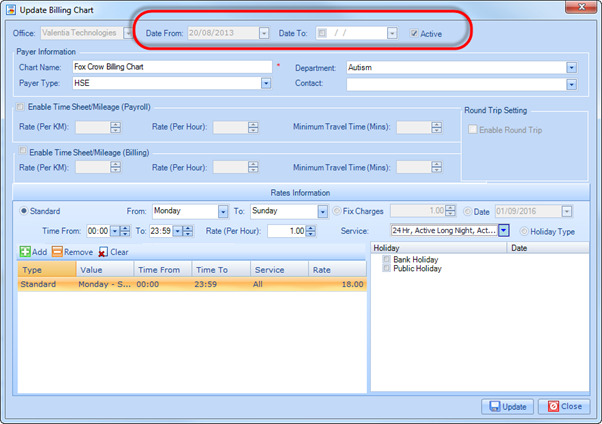
You will also be required to capture a “From Date” where the system will activate this Billing Chart. You can define an End Date on this Billing Chart but this is not mandatory. Once an End Date is defined, when this date is reached, the Billing Chart will automatically be made Inacitve by the system and will no longer be used to calculated Billable Hourly Rates.
![]() Define Billing Chart Name
Define Billing Chart Name
To name your Billing Chart, simply type the name into the Chart Name text box.
Define Payer Category Information
You can then define the following information, using the appropriate dropdown lists:
§ The Payer Type
§ The Department
§ The Department Contact
Please note this is extremely important, as outlined in the Billing Chart Categories section of this document, it allows you to categorise how the Billing Chart will invoice relevant departments, etc.